Email.
Get support for your Esendex Email products.
Email Personalisation
What is Email Personalisation?
The personalisation feature allows you to tailor each email sent to make your users feel unique and important. You can personally address each user and refer to their specific needs by using information they have provided you when they signed up for your newsletters. You can create and customise numerous values : first name, last name, salutation, email, gender, city, name of your pet and so on.
This is an example of an email template that shows the level of customisation you now have access to:
Hi [[data:name]],
For our special customers in [[data:city]], we are offering a special sale on [[data:sport]] equipment.
How does it work? It’s very simple:
- Create a contact list & match the contact properties
- Personalise your content in the Esendex Email Editor
Let’s get started!
Create Your Contact List
Go to the ‘Contacts‘ page and select ‘Create a contact list‘.

Select a name for the list that is relevant and can be easily distinguished from other contact lists you have.

Then select if you want to “Insert manually” your contacts or “upload a file”.
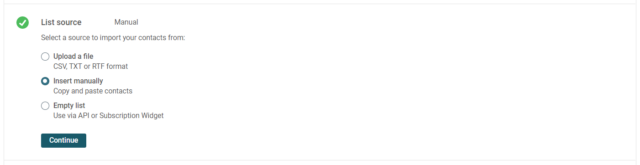
You can add contacts manually or by uploading a file. If you have a significant amount of contacts, we recommend uploading them via a file.
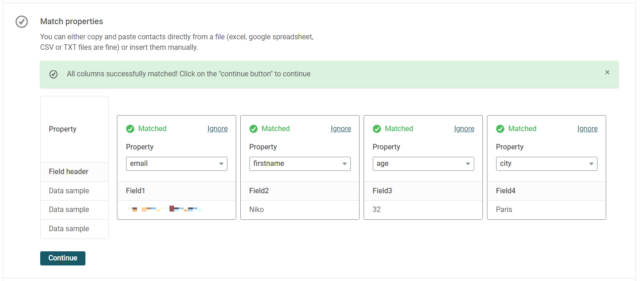
Once the contact list has been uploaded, you can now set the properties for each of the fields. You can select from previously created properties or you can create new properties to match your new list.
Click ‘Continue‘ when you are done matching all the fields.
Check the ‘I certify that:’ checkbox, then click the “Create list” button.

Congratulations, your new personalised contact list is ready to use!
Personalise Your Content
Now that your contact properties are ready, let’s personalise some content.
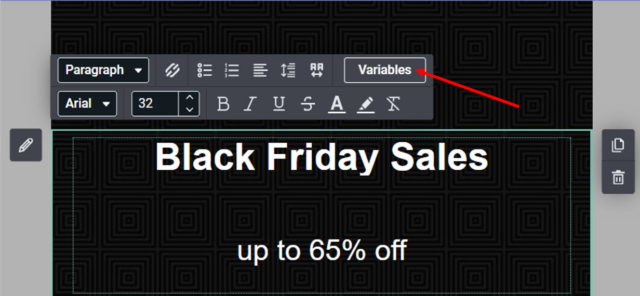
When designing in our Email Editor, you can customise your newsletter text and subject field by adding your contact properties.
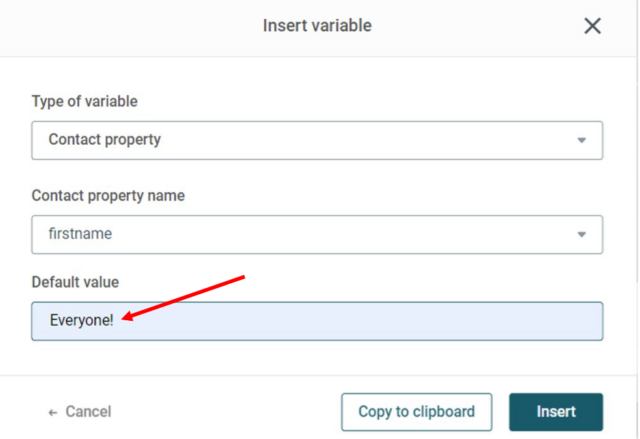
Select the text frame where you want to display the personalised content. Then from the menu bar, click on ‘Variables’.
Select the desired contact property.
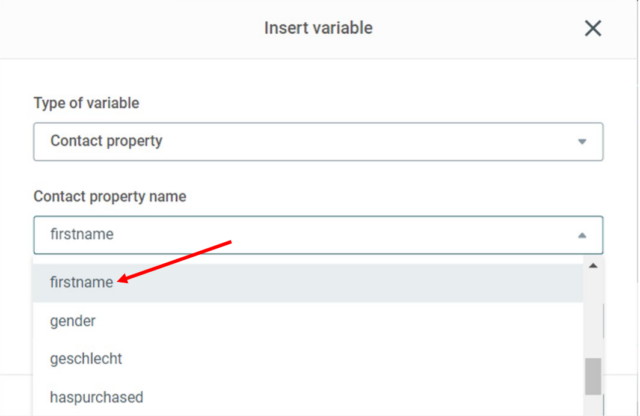
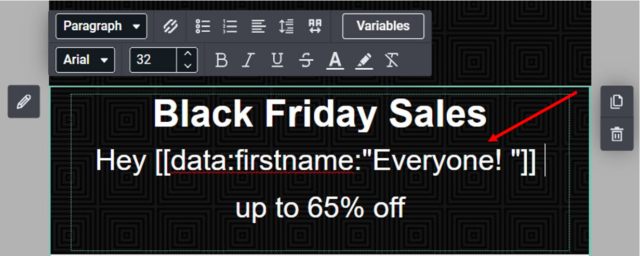
Enter text in the “Default value” box. If your contact does not have a value “firstname“, the default text will appear instead. Click “Insert“.
And that’s it – you have finished personalising your content.
You can change the default text at any time by simply overwriting the text. 🙂
Happy Sending!
Related reading
Recommended articles
Can't find what you're looking for?
Speak to a member of our support team.