Email.
Get support for your Esendex Email products.
Campaign Exclusion List
Summary
- Access your Campaign Exclusion List
- Add Contacts to the Exclusion List
- Remove Contacts
- Download Exclusion List
- Related Reading
Introduction
The Campaign Exclusion List is your own personal ‘Do Not Email’ List – any email addresses in this list will be automatically removed from your campaign sendings but will still receive all your transactional emails.
In this document, you will learn step-by-step how to setup and manage your Campaign Exclusion List.
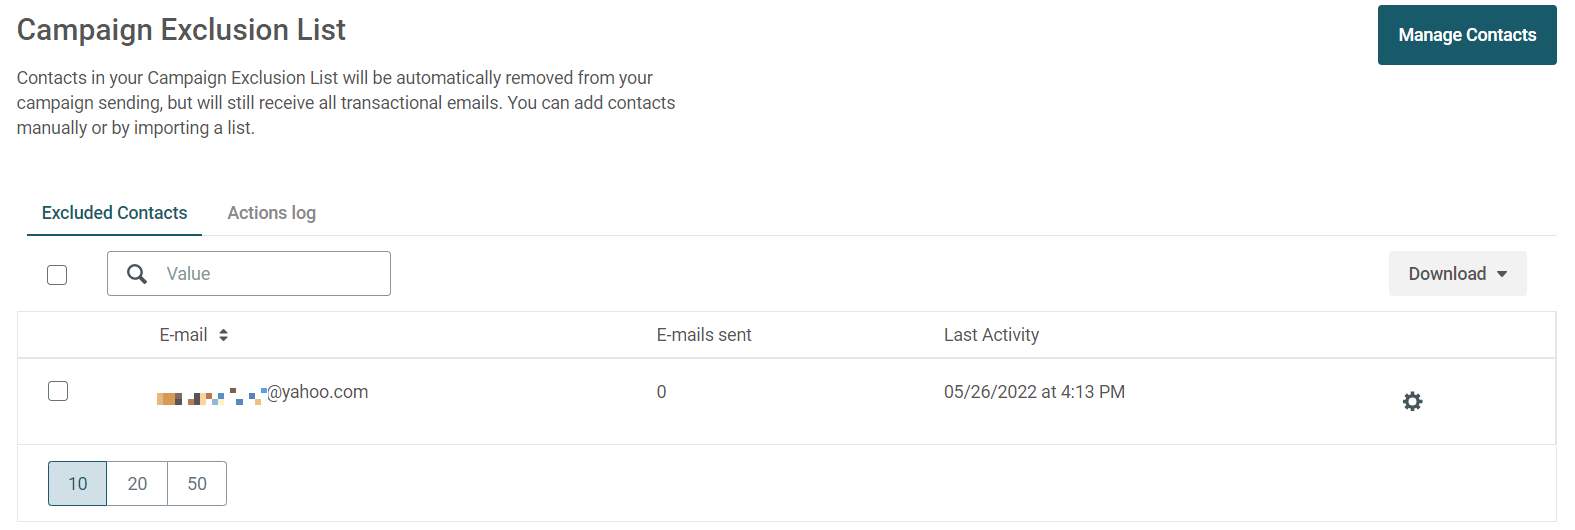
Access your Campaign Exclusion List
From the main menu, select Contacts → Exclusion List.
Here you can see all the currently excluded contacts, the last email activity date for each address, an action log, and the tools needed to manage the list.
Add Contacts to the Exclusion List
You can manually add contacts to your Exclusion List from any contact list, or you can upload a list of contacts directly to your exclusion list.
From a Contact List Page
From your Contacts Page, open an existing contact list. Select Cog icon → Exclude from Campaigns.
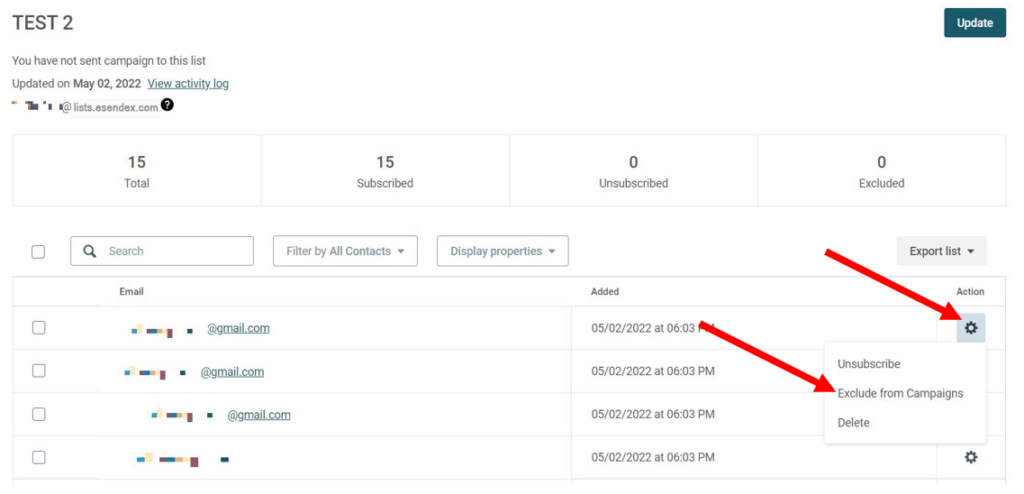
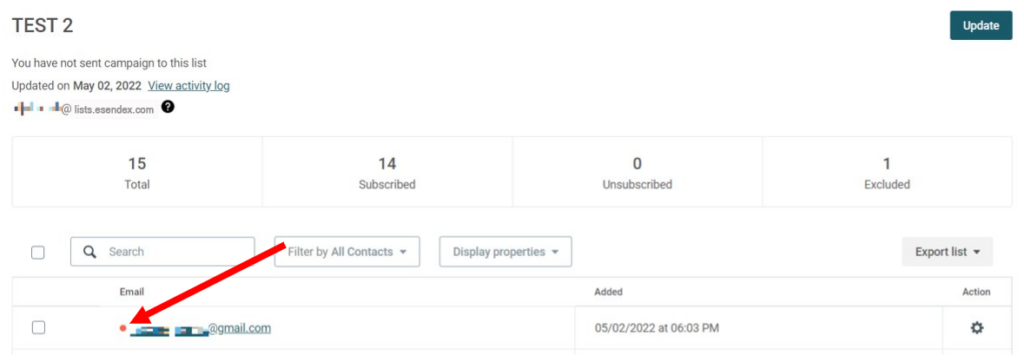
Click on the confirmation message, and the email address is now part of the Exclusion List.
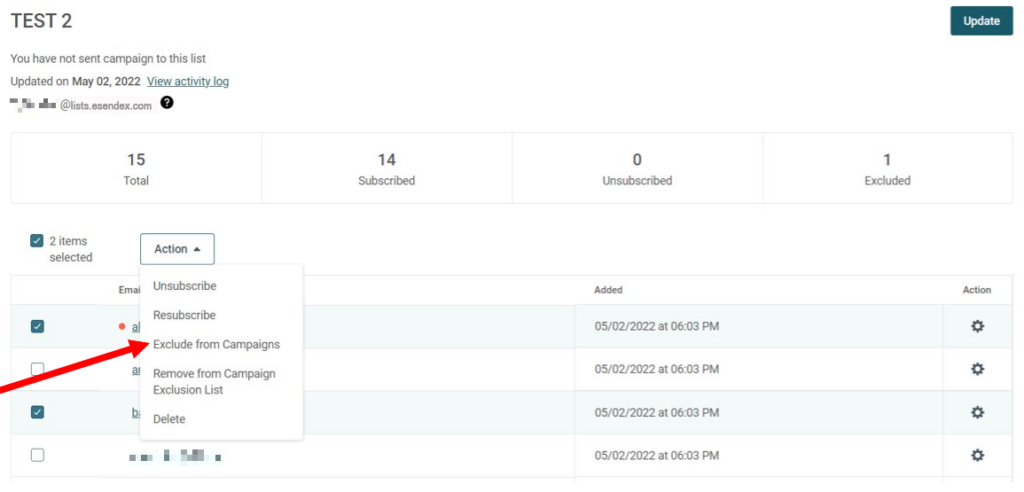
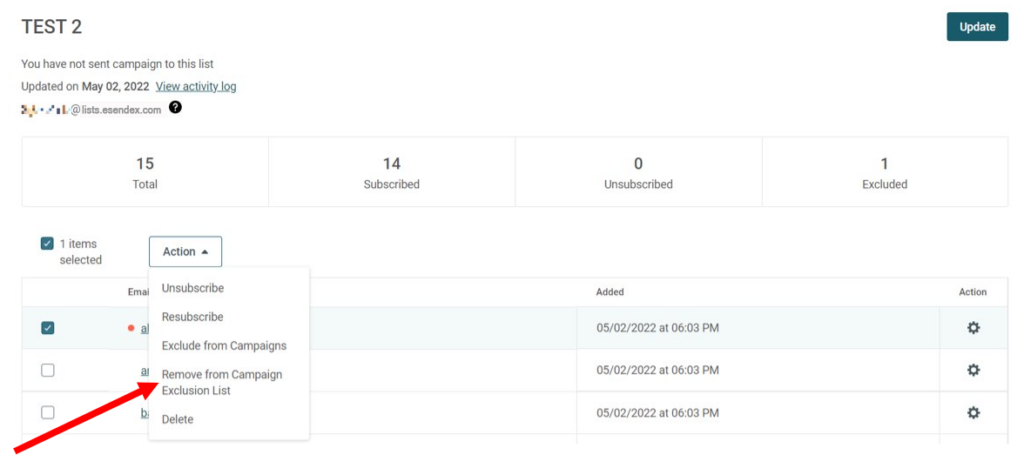
You can also exclude a number of email addresses at once: select all the email addresses you want, then select Action → Exclude from Campaigns.
Import via a file upload
You can upload a list of email addresses that will be added directly to your Campaign Exclusion List.
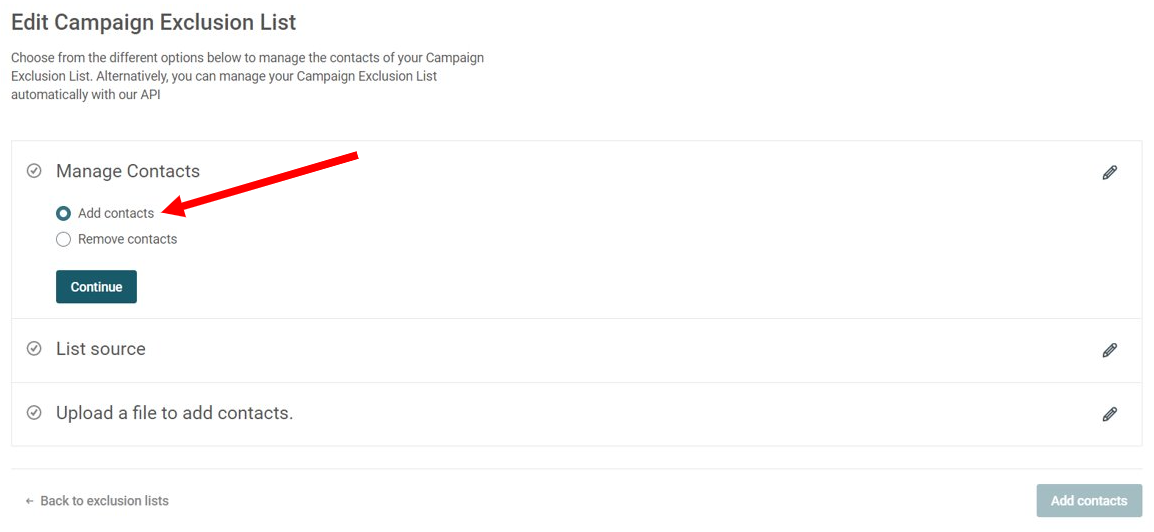
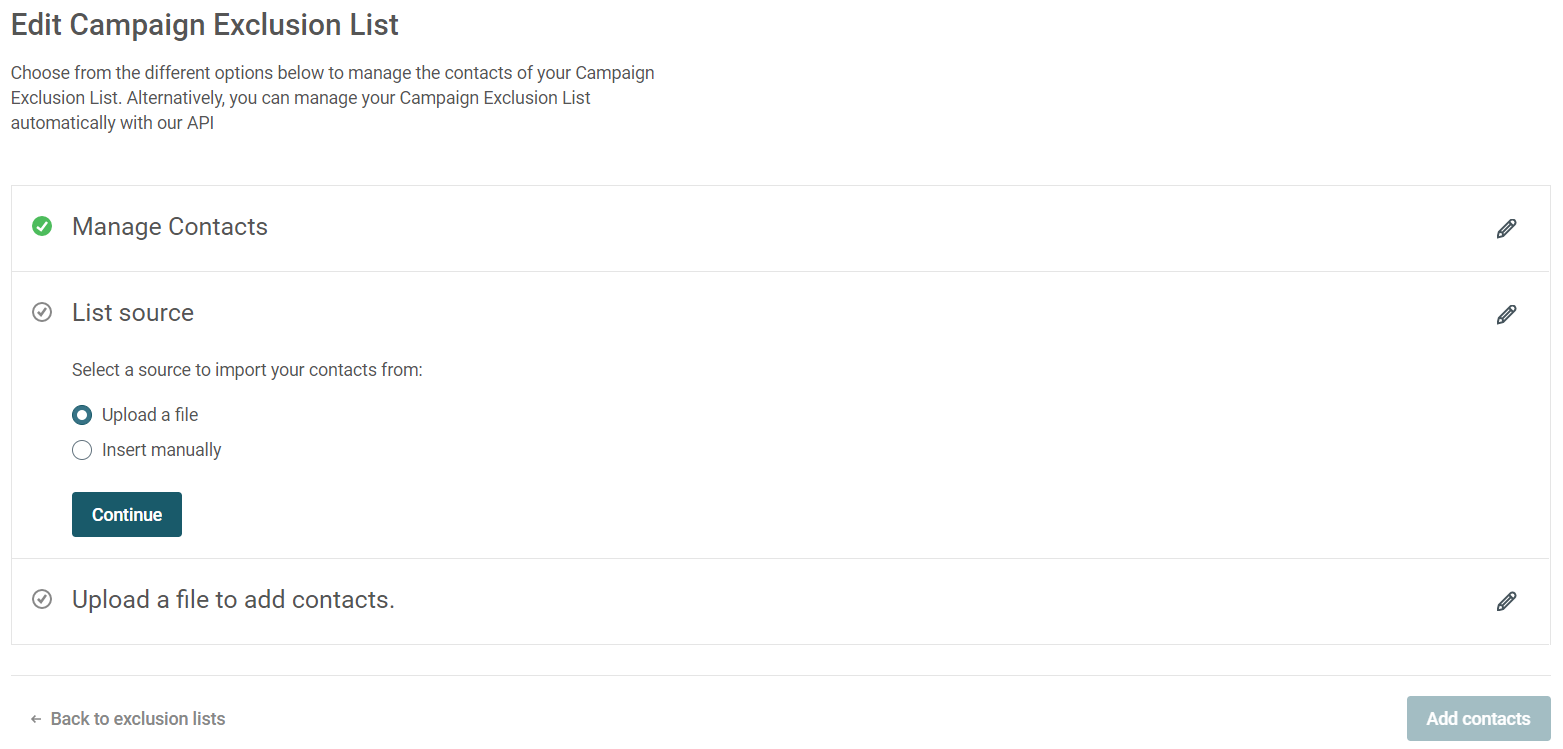
From the Campaign Exclusion List page, click ‘Manage Contacts’.

You have two options at this step: copy & paste the email addresses into the input box, or upload a CSV, TXT or RTF file.
Please note: only email addresses can be added to the Campaign Exclusion List; any other contact properties (name, city, etc) will be ignored during the import.
When ready, click the ‘Add contacts’ button to start the import.
And that’s it – the email addresses have been added to your exclusion list.
Remove Contacts from the Exclusion List
You can remove addresses directly from the Exclusion List page or from the Contact List where that email address resides.
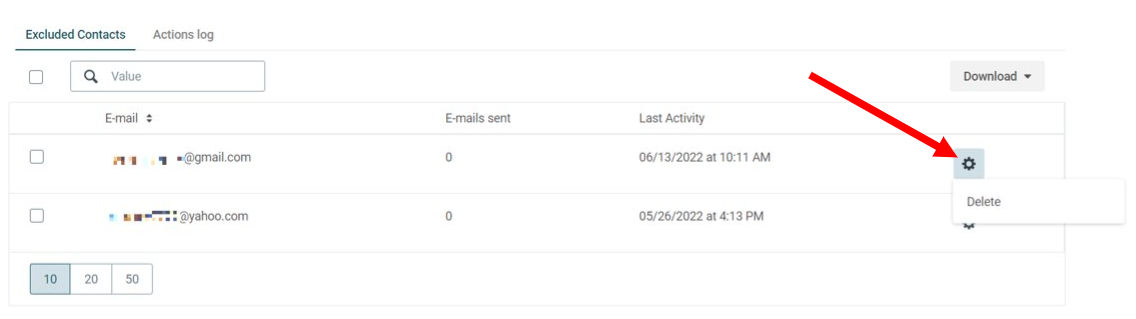
Exclusion List Page
You can remove an individual address by selecting the Cog icon and then clicking on ‘Delete’. Click on the confirmation message. The address will be removed from the list and will once again receive your campaigns.
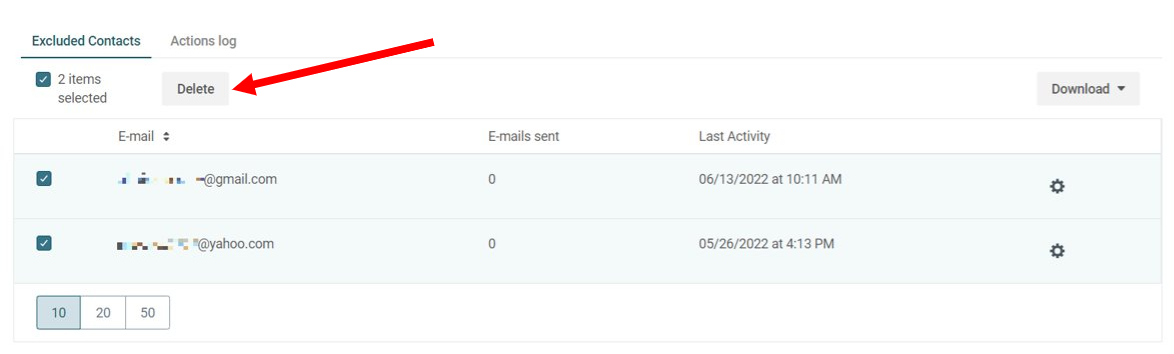
You can also remove many contacts at once: select the addresses then click on the ‘Delete’ icon.
Contact List Page
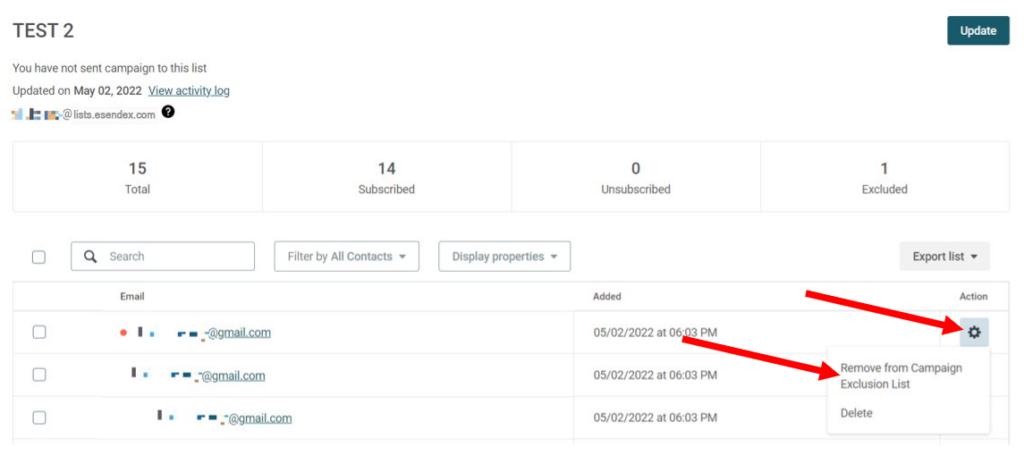
Similar to adding contact addresses from a contact list, you can remove an individual contact by clicking on the Cog icon and then ‘Remove from Campaign Exclusion List’.
Or remove several addresses at a time.
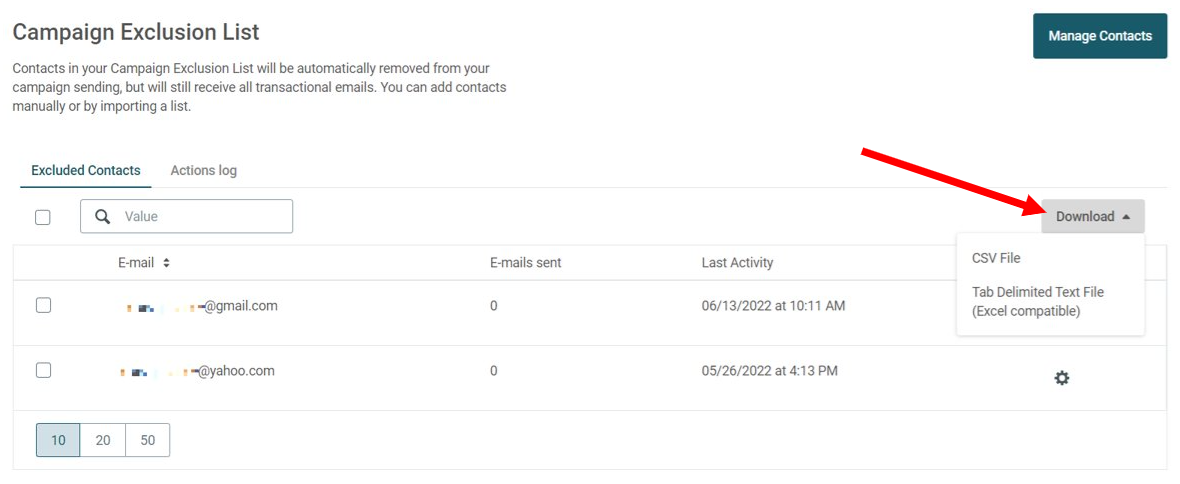
Download the Exclusion List
You can export your Exclusion List as a CSV file or a TAB delimited file by clicking on the ‘Download‘ button.
Related Reading
Managing Your Contact Lists
Build Your Campaigns with the Esendex Email Editor
Recommended articles
Can't find what you're looking for?
Speak to a member of our support team.