Email.
Get support for your Esendex Email products.
A/B Testing
Introduction
- Have you ever wondered which subject line results in more opens?
- Would a red ‘Get Started’ button produce more clicks than a green one?
- Does having your company name in the sender name really make a difference?
Stop wondering and start getting answers with Esendex A/B Testing!
Note: A/B Testing is only available for Premium plans.
What does A/B Testing mean exactly?
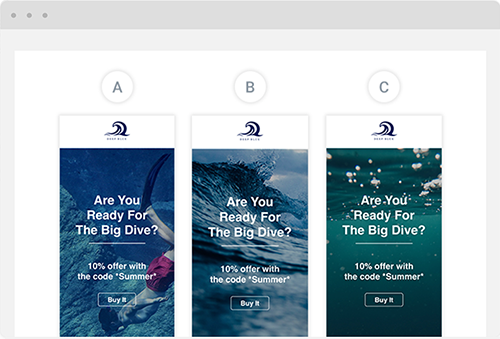
Through Esendex A/B Testing (AB Testing), you are free to test almost anything within your email and compare up to 10 versions simultaneously.
Once you decide on what elements (such as subject line, sender name, images, buttons, …) you want to test and how many versions of the email you want to send, you are ready to launch the A/B Test.
You set the testing criteria (open rate, click rate, …) and then each version is sent to a small but equal number of recipients from the same contact list.
Our powerful analytics tool shows real data in intuitive graphs, telling the story of which version resonated best with your customers.
You can then choose to send the winning version to the remaining recipients on that contact list, or have Esendex do it for you automatically!
The bottom line with A/B Testing, you benefit from very efficient email testing and together with other features of Esendex (Segmentation, Campaign Comparison), you will know how to design the most effective email and send it to the most rewarding group of recipients.
Creating Campaign Versions
Using the Esendex A/B Testing feature is quite simple:
- Design your campaign
- Create one or more variations of that campaign
- Define the test criteria and recipient size
- Review the results
Let’s start by going to your Campaigns page and clicking the ‘New Campaign’ button.
Step 1: Setup
The ‘Create a new campaign‘ page shows the different sections of your campaign that need to be completed:
- Campaign Name: This is an internal name for your campaign that only you see
- Language: Set the language of your campaign
- Subject: The subject of your campaign as it appears in your recipient’s inbox
- From: Enter the name your recipients will see in the ‘from’ field, and the sending address
- Content: Now the fun part: designing your content with the Esendex Email Editor. Get started by clicking ‘Design email‘ to select your campaign template.
- Contact List: Select your contact list. For premium plans users, create or apply a segmentation.
For more information on segmentation, please read the FAQ: How to segment contact lists
Click ‘Design email‘ to select your campaign template and design your different versions with our Email builder.
Step 2: Design
Customize your campaign by adding new elements with a quick drag-and-drop. Click in any section to edit it. (For detailed information on how to use all the features, please read our Guide.)
Excellent! You have created your campaign, also known as Version A.
To create a new version, click on the drop down list, and select ‘Create a new version‘.
And Version B has been created.
Anytime a new version is created, it is an exact copy of the immediate previous. If you were to create Version C, it would be an exact copy of Version B, and so on.
To change the subject and sender details for Version B, click on the Edit icon.
To delete a version, simply click on the drop down list and select ‘Delete this version’. (When you delete a version, any subsequent versions are renamed accordingly.)
Be careful on the number of changes you make in a single version. Having too many variables will make it difficult to determine which one variable made the most impact. Remember, you can create up to 10 versions of the same campaign.
Once you are ready to send your campaign, click on ‘Review & Send’.
Step 3: Test Sample & Winner Criteria
Now that you have created your campaign versions and back on the ‘Create a new campaign’ page, the next step is to set the test sample size and the criteria for selecting and sending the winning version.
The A/B Test Sample section will show the default configuration: 20% test sample size and the winning version is automatically send.

Click on the pencil icon to edit the configuration.
Test Sample Size
Enter the percentage of contacts that will receive your campaign versions. The total percentage or number of contacts will be divided by the number of versions you have. (Note: If the number of campaign versions cannot evenly divide into the number of test contacts selected, the remainder will be added to the last version.)
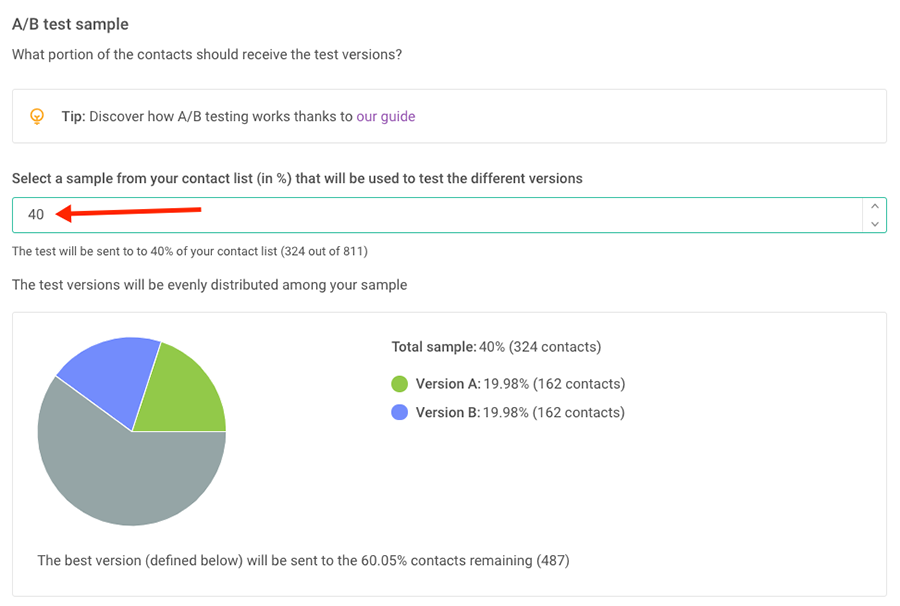
The statistics from this test will be then collected to determine the winning version.
Winner Selection
You can now select how the winning version will be sent: Automatically or Manually.
With the Automatically mode, you select the criteria that will be used to determine the winning version at the end of the testing period (defined in the next step).
Once a winning version has been decided, Esendex will automatically send it to the remainder of the contact list and you will be notified via an email message.
In the event of a tie, Esendex will choose the winning campaign with the best global score and you will be notified via email.
With the Manually mode, you will review the test results to select & send the winning version within 7 days of the initial sending.
Note: It is required to let the test run a minimum 1 hour before reviewing any results, and the winning version needs to be sent within 7 days of the initial sending. (If after 7 days the winning version is not sent, you will receive notification that your campaign has been cancelled.)
Choose the desired mode, and then click ‘Save’.
Step 4: Schedule & Send
You can choose when to send your test sample by clicking ‘Schedule’.
Note: Scheduled campaigns cannot be edited. To make changes, you’ll need to cancel the scheduled campaign from the dropdown menu, and then edit the content before rescheduling it.
If you selected the Automatically Mode, you can schedule when the test sample and winning version will be sent.
Note: The A/B test needs to run at minimum 1 hour before the winning version can be determined. If your test sample is large, you may wish to run the A/B test for a longer period before the winner is selected.
If you selected the Manual Mode, you can schedule when the test sample will be sent and set a reminder to analyse the results. Remember, the winning version needs to be manually sent within 7 days of the initial sending, otherwise the campaign will be cancelled.
Click ‘Send now‘ and your A/B Campaign is underway.
Accessing your A/B campaign
Regardless if your campaign is ongoing or completed, you can view it just like a regular campaign:
From your Campaigns page, simply click on the ‘A/B test’ tab then on your campaign title.
Viewing an ongoing A/B Test Auto Mode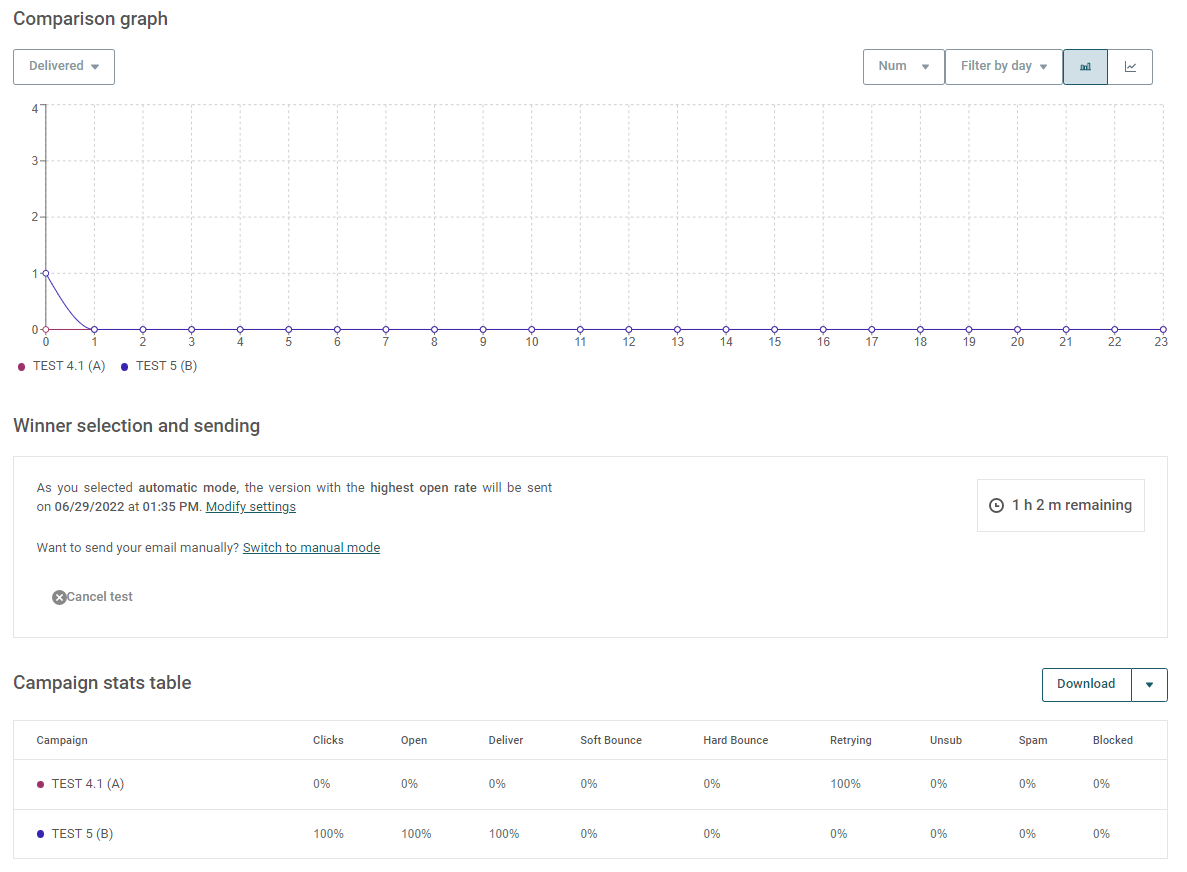
With an ongoing A/B Test in Auto mode, you can:
- Change from Automatic to Manual mode, and then you can decide the winning version
- Adjust the winning version criteria
- Change the date or time when the winning version will be sent.
- Cancel the A/B Test altogether.
If no messages have been sent, your campaign will be saved as a draft that you can send at a later date. If messages have already been sent, your campaign will be saved as a normal campaign.
- Grab a coffee and wait for Esendex to pick the winner
View an ongoing A/B Test Manual
With an A/B in Manual mode, you can select the winning version at any time: From the drop down list, select the winning version and then click ‘Send This Version’.
The other options with an ongoing A/B in Manual mode are:
- Change from Manual to Automatic mode. You would need to select the winning criteria and the date & time when the winning version will be sent.
- Change the date or time of your reminder email.
- Cancel the A/B Test completely.
If no messages have been sent, your campaign will be saved as a draft that you can send at a later date. If messages have already been sent, your campaign will be saved as a normal campaign.
View Completed A/B Test – Manual or Auto mode
Once the A/B Test has been completed, you will be able to view the powerful data to gain insight to what your customers liked and loved about your different versions.
The graph displays the selected data metric whereas the chart shows the details of all statuses for each version.
A) Change the display unit, time range, and chart type.
B) Select the desired metric to be displayed in the graph. And if you put your mouse over the graph, a popup will show the KPIs for each campaign.
C) Toggle the campaign display on the graph by clicking on the name.
Kick up your analysing power to another level by comparing various campaigns and benchmarks. Please read the Campaign Comparison Guide for more information.
You are now ready to test and optimize your campaigns to your heart’s content… or at least on a regular basis depending on how often you communicate with your customers!
Happy A/B Testing!
Recommended articles
Can't find what you're looking for?
Speak to a member of our support team.